Hour Instant Pot Carnitas: Crispy & Tender Mexican Pork Perfection
Imagine succulent, fall-apart tender pork infused with vibrant Mexican flavors, boasting those irresistible crispy, caramelized edges – all achieved in just over an hour with minimal effort. This isn't a culinary dream; it's the reality of making
Instant Pot pork carnitas. Forget hours of simmering on the stovetop or slow-roasting; your electric pressure cooker transforms tough pork shoulder into a fiesta-ready meal faster than you can say "¡Olé!" Perfect for busy weeknights yet impressive enough for entertaining, these carnitas are a game-changer for anyone craving authentic Mexican flavors without the all-day commitment.
Carnitas, meaning "little meats" in Spanish, traditionally involve slow-cooking pork in its own fat until it's incredibly tender, then crisping the exterior. While that method delivers undeniable deliciousness, it's not always practical for modern life. Enter the Instant Pot, a marvel of modern kitchen technology that replicates the tenderizing magic in a fraction of the time, allowing you to achieve those coveted crispy bits right at the end. This recipe is also naturally Whole30 and Paleo-compliant, offering a healthy and hearty main course that truly satisfies.
The Magic Behind Crispy & Tender Instant Pot Pork Carnitas
The beauty of making
Instant Pot pork carnitas lies in its two-stage cooking process. First, the high-pressure environment of the Instant Pot quickly breaks down the tough connective tissues in the pork shoulder (pork butt), rendering it incredibly tender and juicy. This stage infuses the meat with a bright, aromatic liquid featuring orange juice, lime juice, garlic, and a bay leaf, creating a deeply flavorful foundation. The pressure cooking ensures that every morsel of pork is moist and succulent, absorbing all those incredible Mexican-inspired seasonings like cumin, oregano, and chili powder.
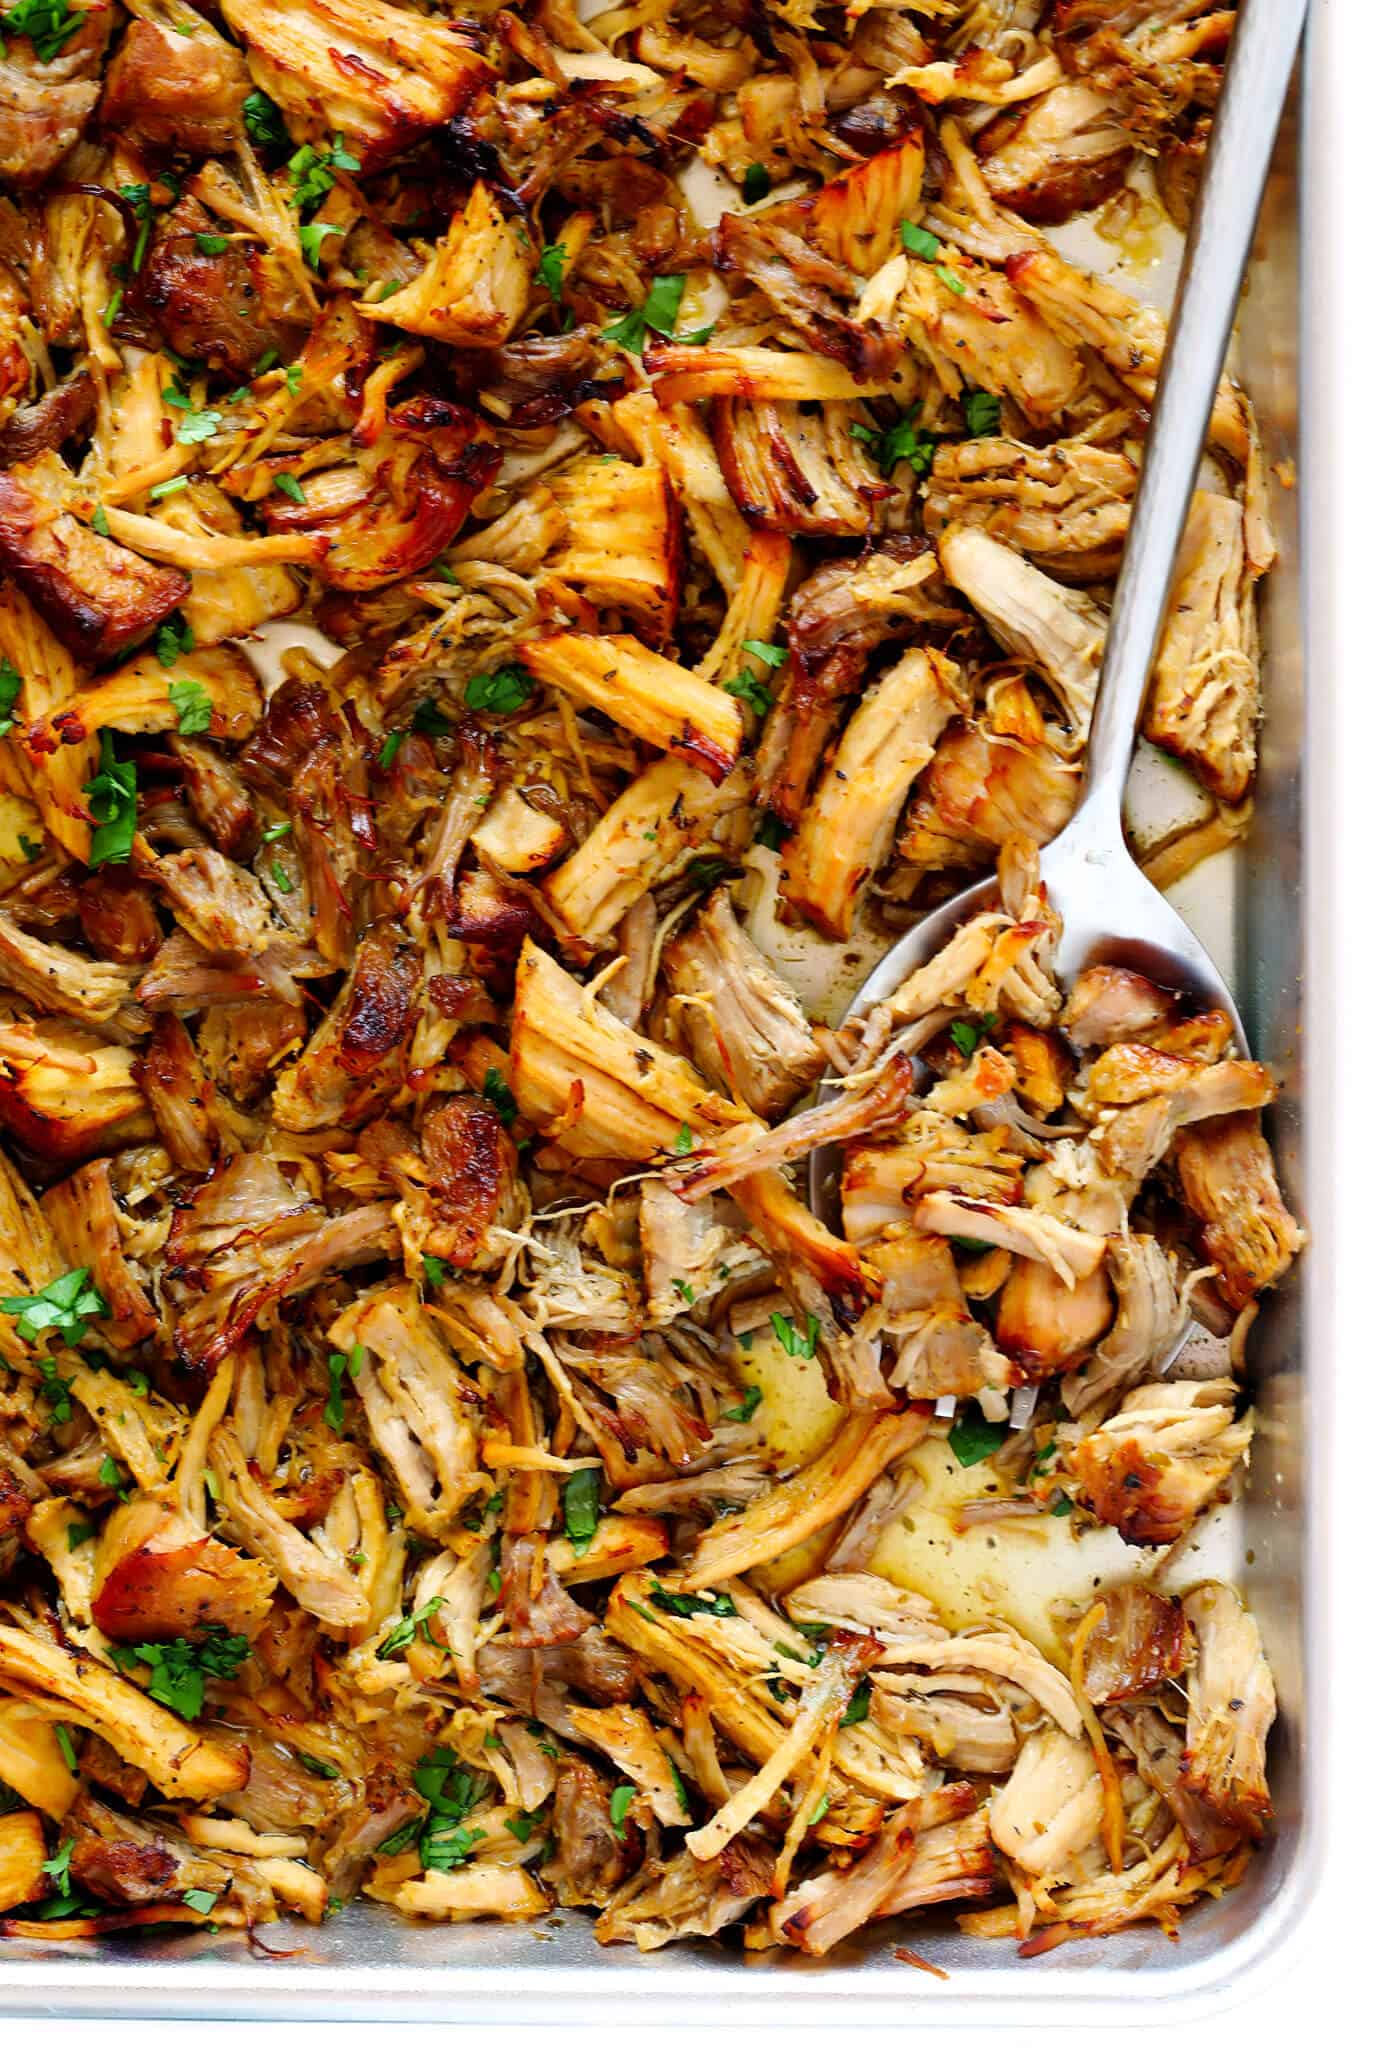
But tender pork alone isn't true carnitas. The signature characteristic is the crispy, browned edges that add a textural contrast and depth of flavor. This is where the second stage comes in. After pressure cooking, the pork is gently broken into smaller chunks – not shredded, but robust pieces that can develop a beautiful crust. These chunks are then sautéed, either directly in the Instant Pot liner or in a separate skillet, until they achieve that perfect golden-brown crispness. A splash of the reserved cooking liquid keeps the meat moist from within while allowing the exterior to caramelize, creating a harmonious balance of textures and flavors that makes
Instant Pot pork carnitas so irresistible. The entire process, from prep to table, clocks in at just over an hour, making it an ideal choice for a satisfying meal any day of the week.
Essential Ingredients for Authentic Flavor and Texture
Crafting truly delicious
Instant Pot pork carnitas starts with selecting the right ingredients. Each component plays a vital role in achieving that sought-after balance of tenderness, juiciness, and rich flavor.
- Pork Butt (Pork Shoulder): This is non-negotiable for authentic carnitas. Its higher fat content and marbling are crucial for achieving that melt-in-your-mouth tenderness and succulent texture. As the pork cooks, the fat renders down, moistening the meat from within and contributing to incredible flavor. Cut it into large chunks (about 2-3 inches) for even cooking and easier handling later.
- Fresh Citrus Juices (Orange & Lime): These aren't just for flavor; the acidity helps to tenderize the pork while adding a bright, zesty counterpoint to the richness of the meat. Freshly squeezed is always best for the most vibrant taste. The orange juice contributes a subtle sweetness that is classic in many carnitas recipes.
- Garlic & Bay Leaf: Aromatic powerhouses that infuse the cooking liquid and pork with depth and warmth. Crushed garlic releases its oils more effectively.
- Traditional Mexican Spices: Cumin, dried oregano, chili powder, and thyme form the backbone of the carnitas' savory flavor profile. Don't forget sea salt and freshly ground black pepper to taste – seasoning adequately is key to truly flavorful meat.
- Ghee, Clarified Butter, or Olive Oil: Essential for the crisping stage. Ghee or clarified butter provides a rich, buttery flavor and a high smoke point, while olive oil is a readily available and healthy alternative.
These ingredients, combined with the efficient cooking method of the Instant Pot, lay the foundation for a truly memorable meal. Remember, while flour tortillas are a delicious way to serve them, the pork itself is naturally Whole30 and Paleo, making it incredibly versatile for various dietary needs.
Your Step-by-Step Guide to Instant Pot Carnitas Mastery
Making
Instant Pot pork carnitas is surprisingly straightforward, allowing you to achieve incredible results with minimal fuss. Follow these steps to unlock crispy, tender perfection:
- Prepare the Instant Pot Base: Begin by adding 1 cup of fresh orange juice, the juice of one lime, 2 large cloves of crushed fresh garlic, and 1 bay leaf to the bottom of your Instant Pot insert. This fragrant liquid will infuse the pork with vibrant flavors as it pressure cooks.
- Season the Pork: In a large bowl, combine your 3 ½ pounds of pork butt, cut into 2-3 inch chunks, with ½ teaspoon ground cumin, ½ teaspoon dried thyme, ½ teaspoon dried oregano, 1 teaspoon chili powder, and sea salt and ground black pepper to taste. Toss thoroughly to ensure every piece of pork is well-coated. This pre-seasoning step is crucial for deeply flavorful carnitas.
- Pressure Cook to Perfection: Carefully place the seasoned pork chunks into the Instant Pot, nestled in the citrus and garlic liquid. There's no need for a rack. Secure the lid, ensuring the sealing knob is in the "Sealing" position. Select the "Manual" or "Pressure Cook" button (High Pressure) and set the time for 50 minutes. This duration ensures the pork breaks down beautifully, becoming incredibly tender.
- Natural Pressure Release: Once the cooking cycle is complete, resist the urge to quick release! Allow the pressure to release naturally for about 20 minutes. This crucial step further tenderizes the pork and ensures the meat remains juicy by preventing a sudden drop in temperature. After 20 minutes, if any pressure remains, you can carefully perform a quick release of the remaining steam.
- Prepare for Crisping: Carefully open the lid. Using tongs or a slotted spoon, remove the tender pork chunks from the pot and transfer them to a large bowl or platter. The pork will be so tender it might already start falling apart. Gently break the larger chunks into smaller, irregular pieces using two forks or your tongs. There's no need to finely shred; rustic chunks are ideal for crisping.
- The Crisping Stage – IP vs. Skillet:
- In the Instant Pot: Carefully remove the liquid from the Instant Pot, reserving about 1 cup. Set the Instant Pot to "Saute" mode. Add 1 tablespoon of ghee, clarified butter, or olive oil to the pot. Once hot, add the broken pork back into the insert. Toss the meat with a wooden spoon or spatula, stirring frequently to encourage browning and crisping on all sides. As the pork crisps, add some of the reserved cooking liquid, a tablespoon at a time, to moisten the meat and help develop that delicious crust. This method keeps cleanup to a minimum but requires more attention as the Instant Pot liner is deep.
- In a Large Skillet (Recommended for Best Crisp): If you don't mind an extra pan, a large cast-iron or heavy-bottomed skillet provides more surface area for crisping, resulting in even better results. Heat 1 tablespoon of ghee, clarified butter, or olive oil over medium-high heat. Once shimmering, add the broken pork chunks in a single layer, avoiding overcrowding the pan. Allow them to crisp undisturbed for a few minutes before flipping. Continue until all sides are beautifully browned and crispy, adding splashes of the reserved cooking liquid as needed to maintain moisture and aid browning.
For a more visual guide or additional insights on achieving that perfect texture, check out our guide on Easy Instant Pot Pork Carnitas: Tender, Crispy, Whole30 & Paleo.
Serving Suggestions & Creative Ways to Enjoy Your Carnitas
Once your
Instant Pot pork carnitas are beautifully crispy and tender, the fun begins with how you choose to serve them. Their versatility is one of their greatest strengths, making them suitable for a variety of meals and preferences.
The classic way to enjoy carnitas is in warm tortillas – corn or flour, depending on your preference. Pile them high with generous portions of the pork, then top with your favorite fresh accompaniments:
- Diced Red Onions: Adds a sharp, refreshing crunch.
- Fresh Cilantro: Essential for that vibrant, herby finish.
- Salsa: Your choice of mild, medium, or hot, for an extra kick.
- Guacamole or Sliced Avocado: Creamy, rich, and a perfect counterpoint to the crispy pork.
- Lime Wedges: A squeeze of fresh lime juice brightens all the flavors.
Beyond traditional tacos, the possibilities are endless:
- Carnitas Bowls: For a Whole30 or Paleo-friendly option, serve over cauliflower rice, mixed greens, or roasted sweet potatoes. Top with all your favorite fresh fixings.
- Nachos & Quesadillas: Layer carnitas with cheese, beans, and other toppings for decadent nachos, or tuck them into quesadillas for a cheesy, savory treat.
- Breakfast Burritos: As the reference context playfully suggests, leftover carnitas make incredible breakfast burritos. Add scrambled eggs, cheese, and perhaps a dollop of a spicy Ancho-Orange Barbecue Sauce for an unforgettable morning meal.
- Salads & Sandwiches: Use chilled carnitas to elevate a lunch salad or create a unique, flavorful sandwich.
If you're looking to dive deeper into perfecting the flavor profile, especially with the citrus and garlic notes, our article
Make Perfect Instant Pot Carnitas: Orange-Garlic Mexican Pork offers excellent tips.
Tips for Perfect Carnitas Every Time & Storing Leftovers
To ensure your
Instant Pot pork carnitas are consistently delicious, keep these tips in mind:
- Don't Shred, Break: Resist the urge to finely shred the pork like pulled pork. For carnitas, you want rustic, irregular chunks that can develop distinct crispy edges while maintaining a tender interior.
- Crisp Generously: This is the key to authentic carnitas. Don't rush this step. Allow the pork to sit undisturbed for a few minutes on each side to get that golden-brown crust. Using a good amount of fat (ghee, olive oil) and not overcrowding the pan will aid in crisping.
- Moisten with Cooking Liquid: The reserved cooking liquid is your secret weapon. Adding small splashes during the crisping stage helps keep the meat juicy and promotes further caramelization without drying it out.
- Leftover Longevity: To keep your leftover carnitas from drying out in the refrigerator, always add a generous splash of the remaining cooking liquid to the container before sealing. This keeps the pork moist and flavorful for days. Reheat gently, perhaps with a quick pan-fry to re-crisp.
- Batch Cooking Friendly: Carnitas freeze wonderfully! Cook a larger batch, portion it out with some cooking liquid, and freeze for quick meals later. Thaw overnight in the fridge and crisp up before serving.
With these tips, you'll be well on your way to mastering the art of homemade
Instant Pot pork carnitas.
Conclusion: Your New Favorite Instant Pot Meal
There's a reason
Instant Pot pork carnitas have become a household favorite: they offer an unbeatable combination of convenience, incredible flavor, and satisfying texture. From the initial burst of citrus and spices during pressure cooking to the final, glorious crisping in a hot pan, every step contributes to a dish that's rich, savory, and utterly addictive. Whether you're serving them in traditional tacos, healthy bowls, or getting creative with breakfast burritos, these tender, crispy Mexican pork pieces are guaranteed to be a hit. So, ditch the long cooking times and embrace the efficiency of your Instant Pot. You're just over an hour away from enjoying some of the most delicious homemade carnitas you've ever tasted – trust us, your taste buds will thank you!